Play with the Fire
After we had already successfully completed two parts of our Corona replacement shooting (Colored screw Nuts and Flying Fruits) and there was still some time left, we decided to play with fire for a while. Fire is a very beautiful element, but also very dangerous. Therefore we have to warn you right from the start! Photography with fire is fun, but also dangerous! Always have something ready to extinguish fire if it spreads where it shouldn't! Practice fire photography outdoors whenever possible to avoid setting anything on fire unintentionally
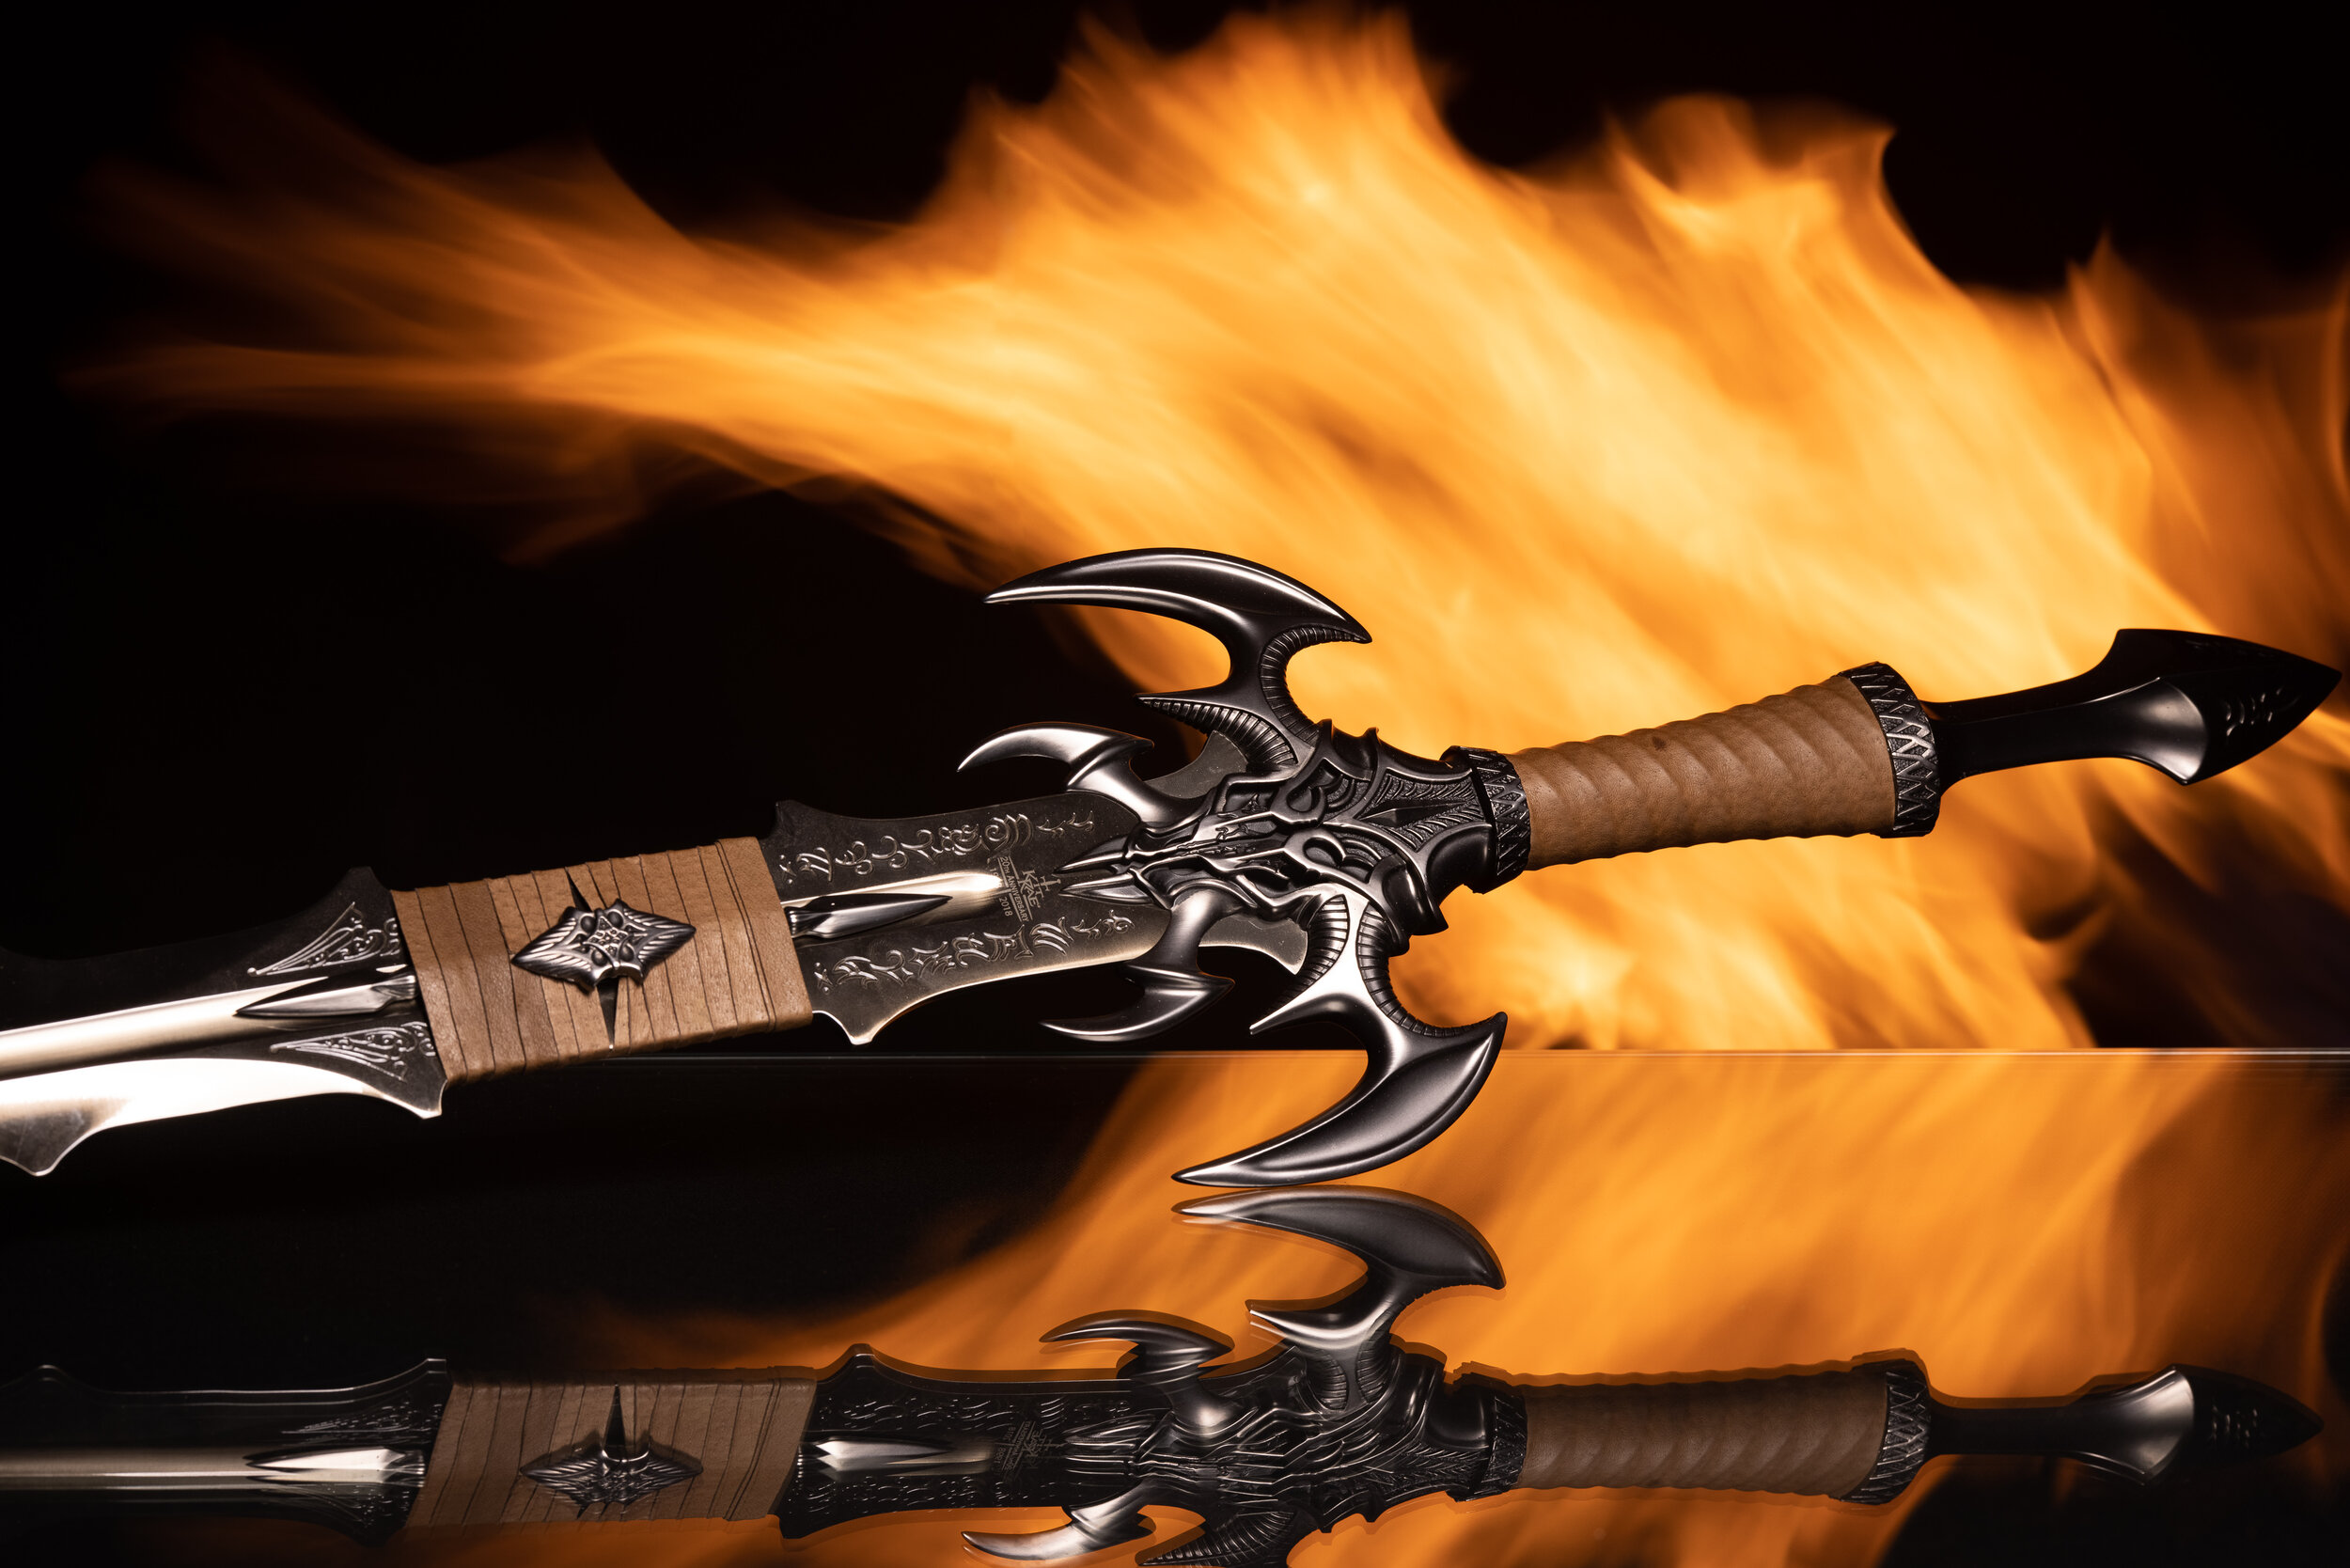
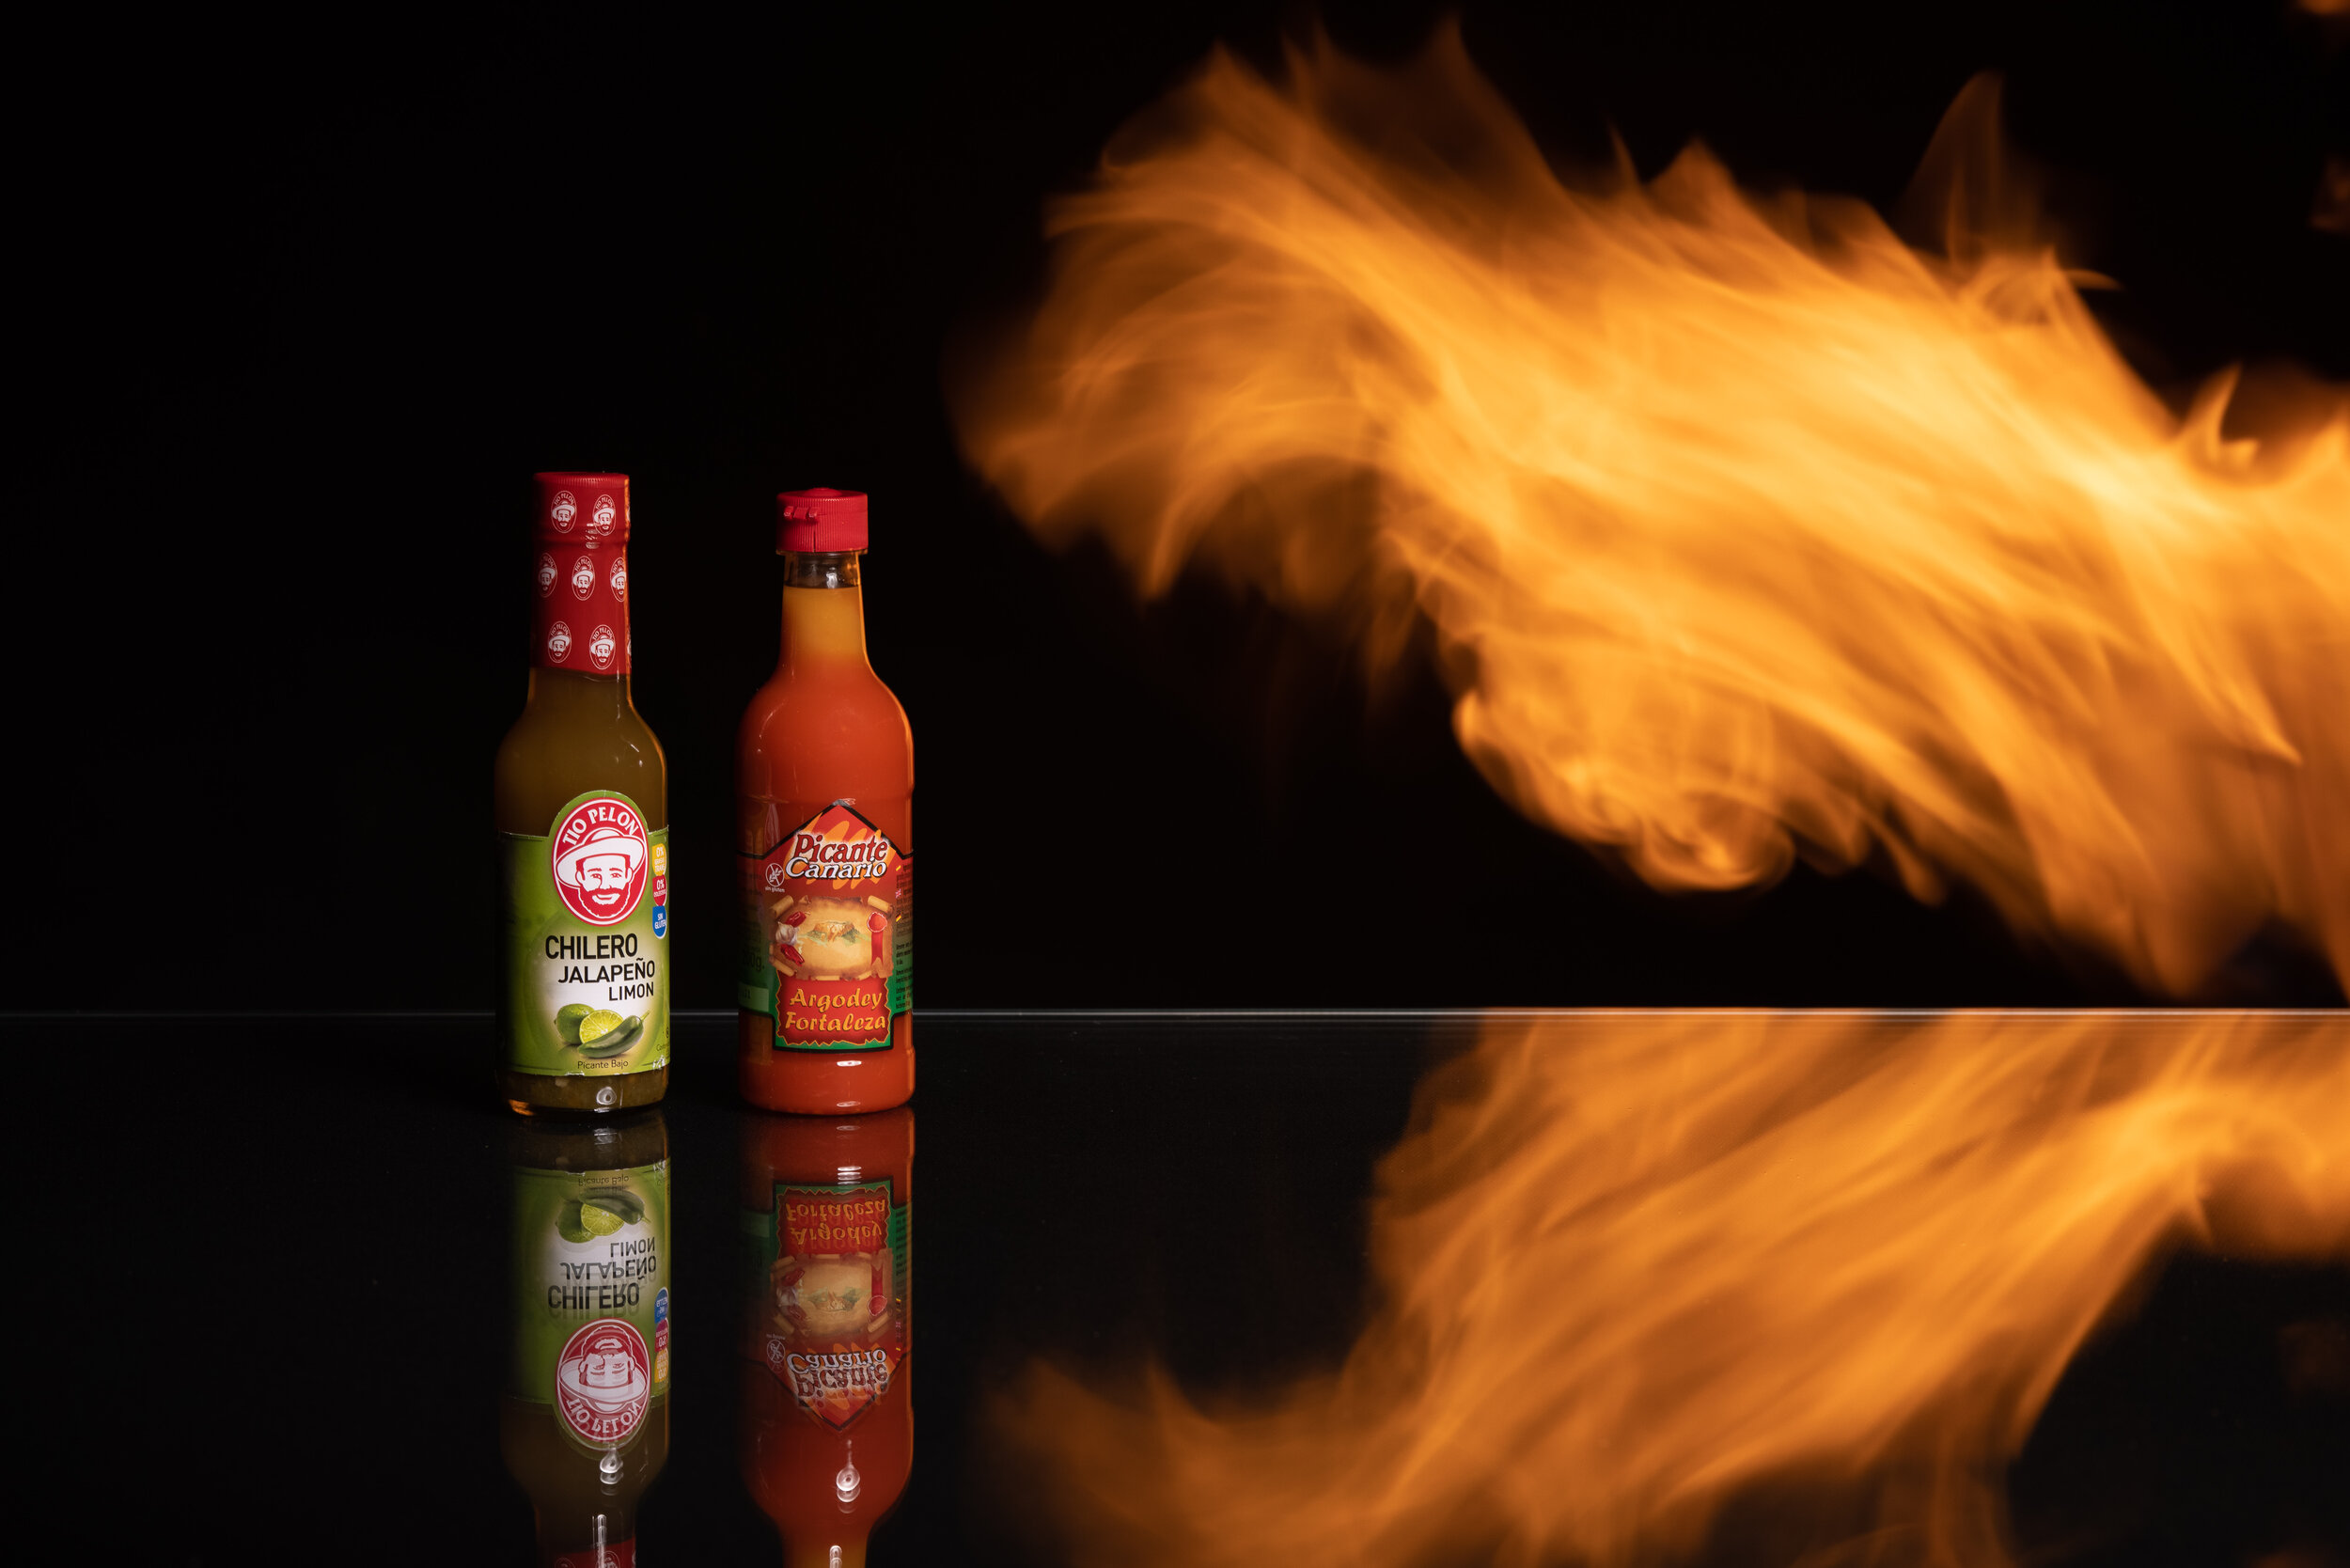
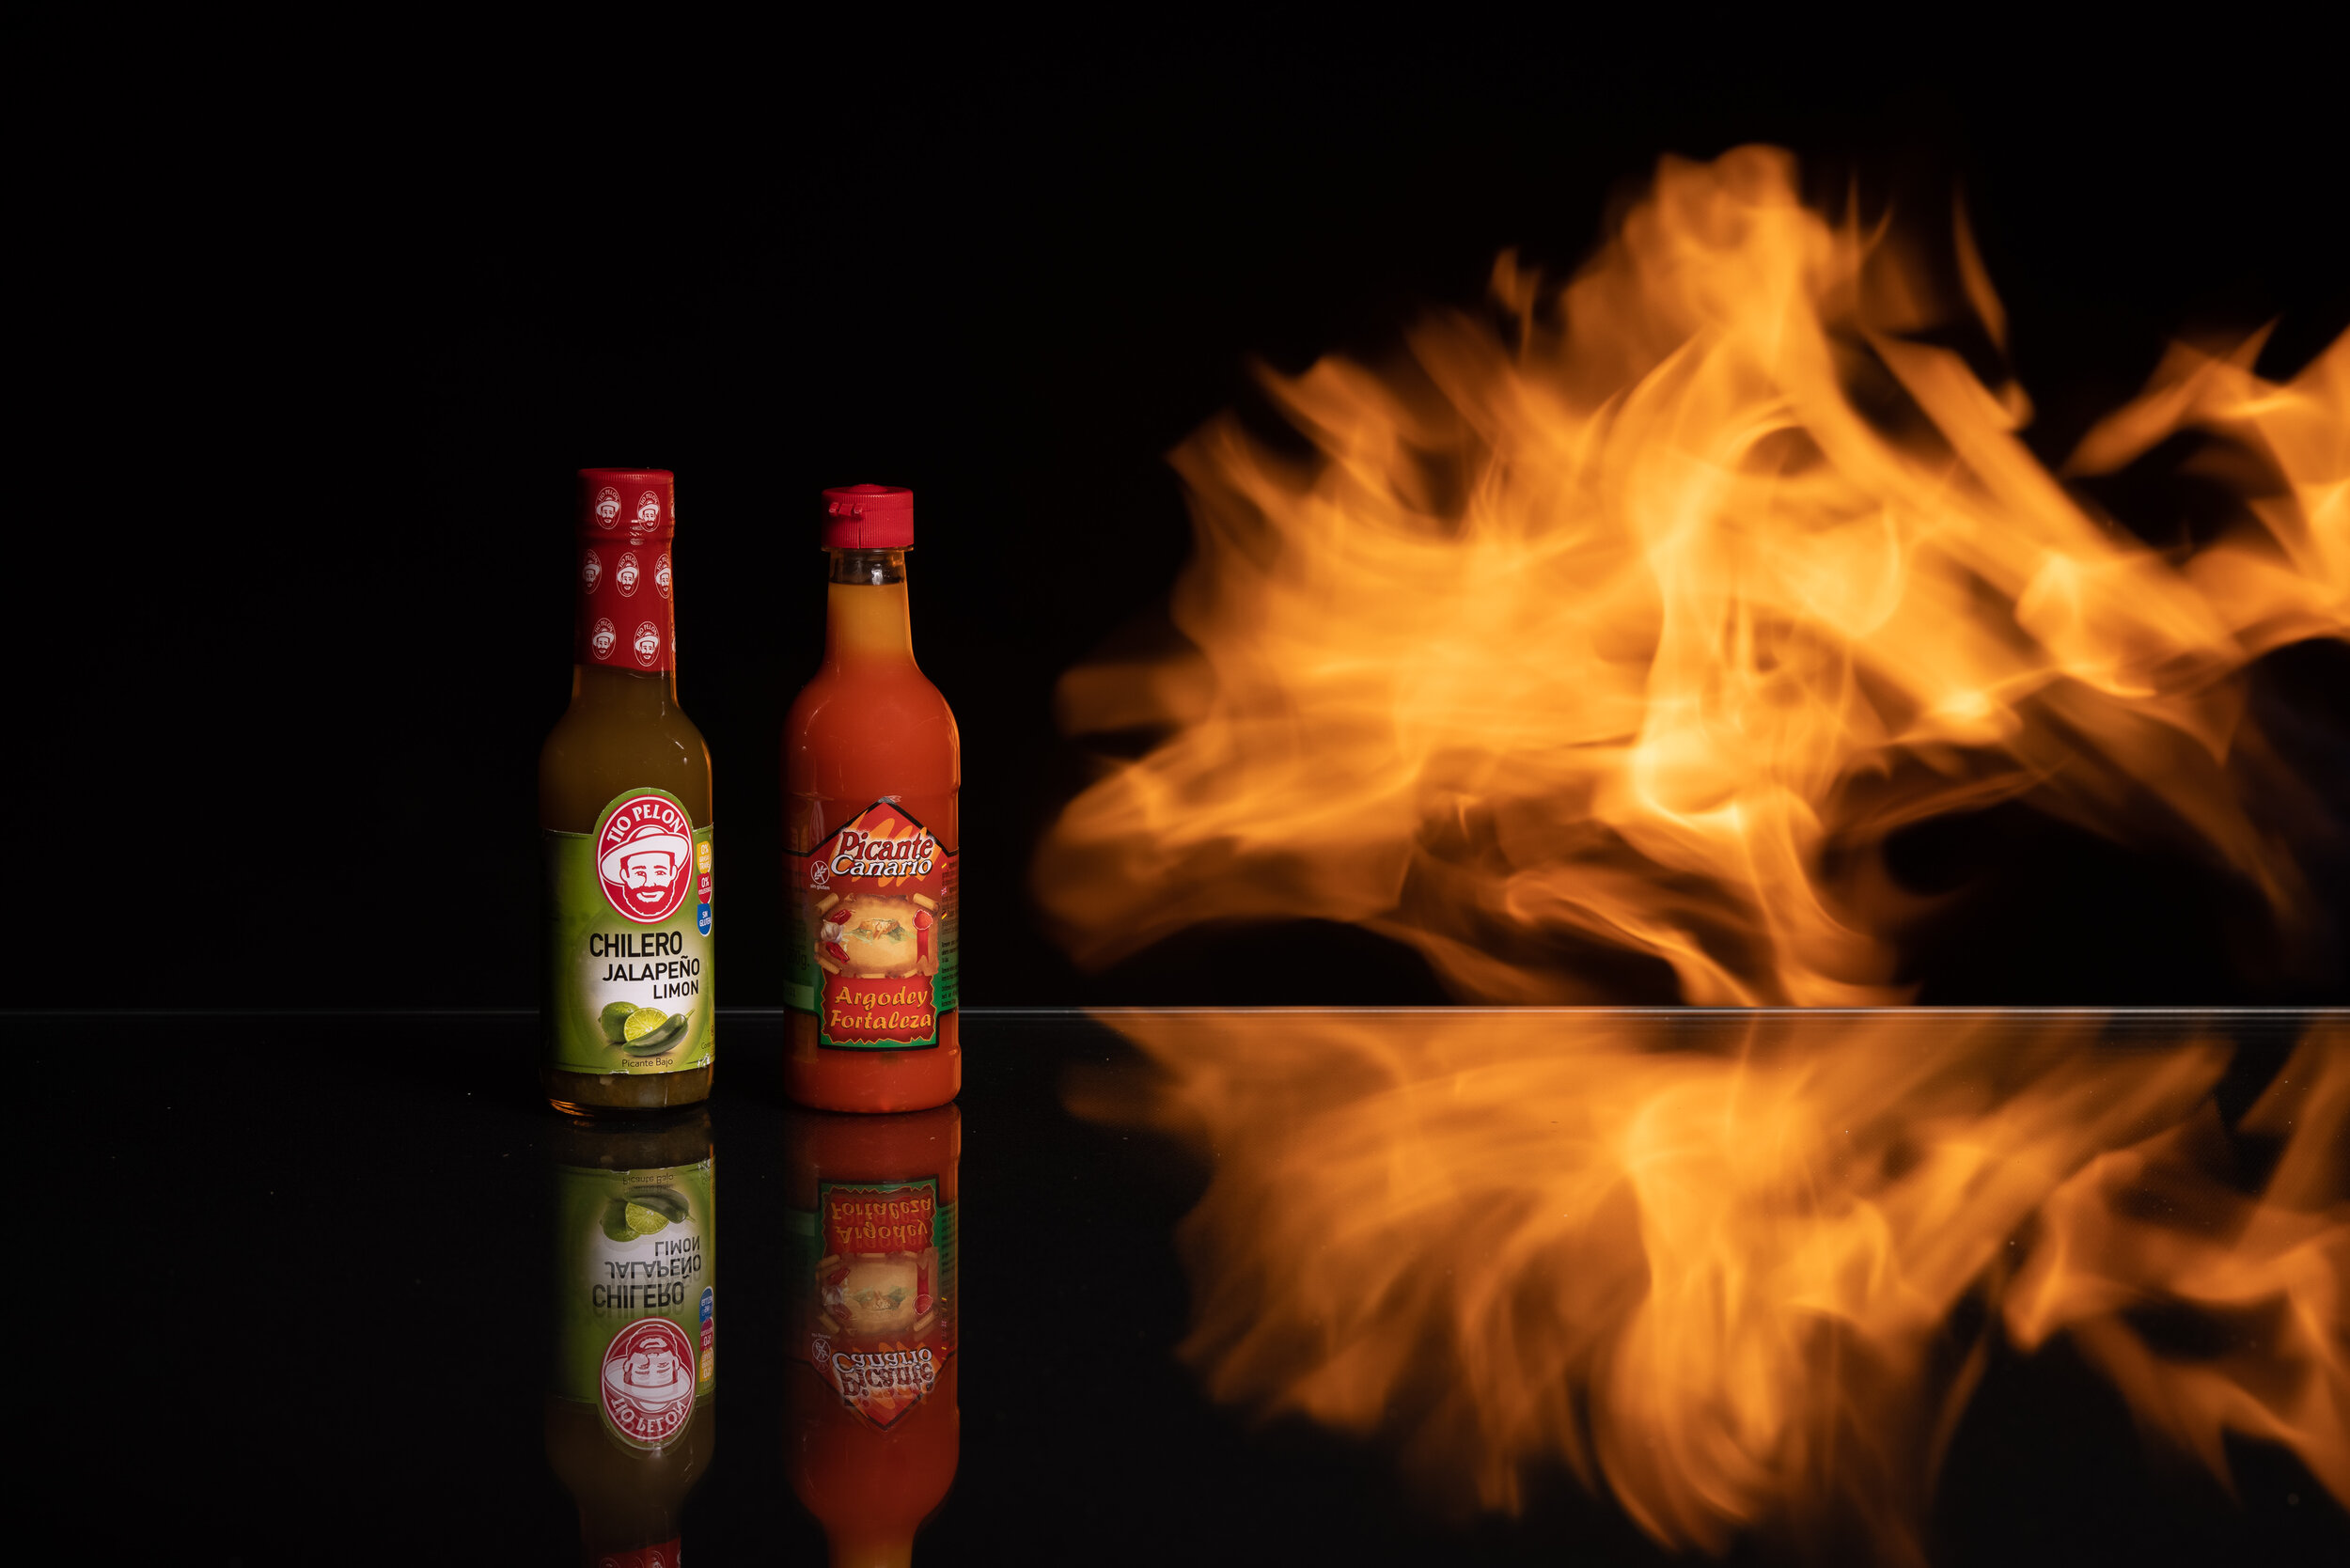
As a basis for the construction we orientated ourselves on the first set with the Colored screw nuts. With the difference that this time we did not want to flash through the glass, but rather use the glass as a reflection surface. To make the reflection look beautiful we stretched a black cloth under the glass.
For the lighting setup we decided to use a beauty dish with honeycomb, which should illuminate only the sword/tabasco bottle from above, but not the background. Between the setup with the sword and the black background we left about 2m space, which was considered as a safety distance for the fire. We filled the fuel into a hand sprayer like the one used in the garden. With a Bunsen burner we ignited the fuel directly in the air. The flame goes out very quickly, so it is almost impossible to do this alone. We have divided up in each case. One of us generates the flame, the other takes the photo.
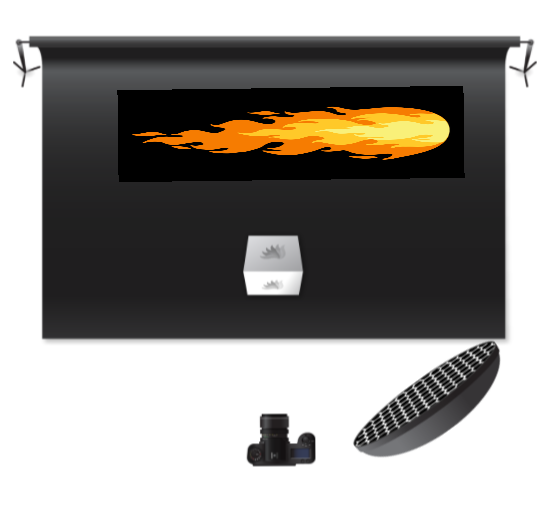
Light setup play with the Fire 1
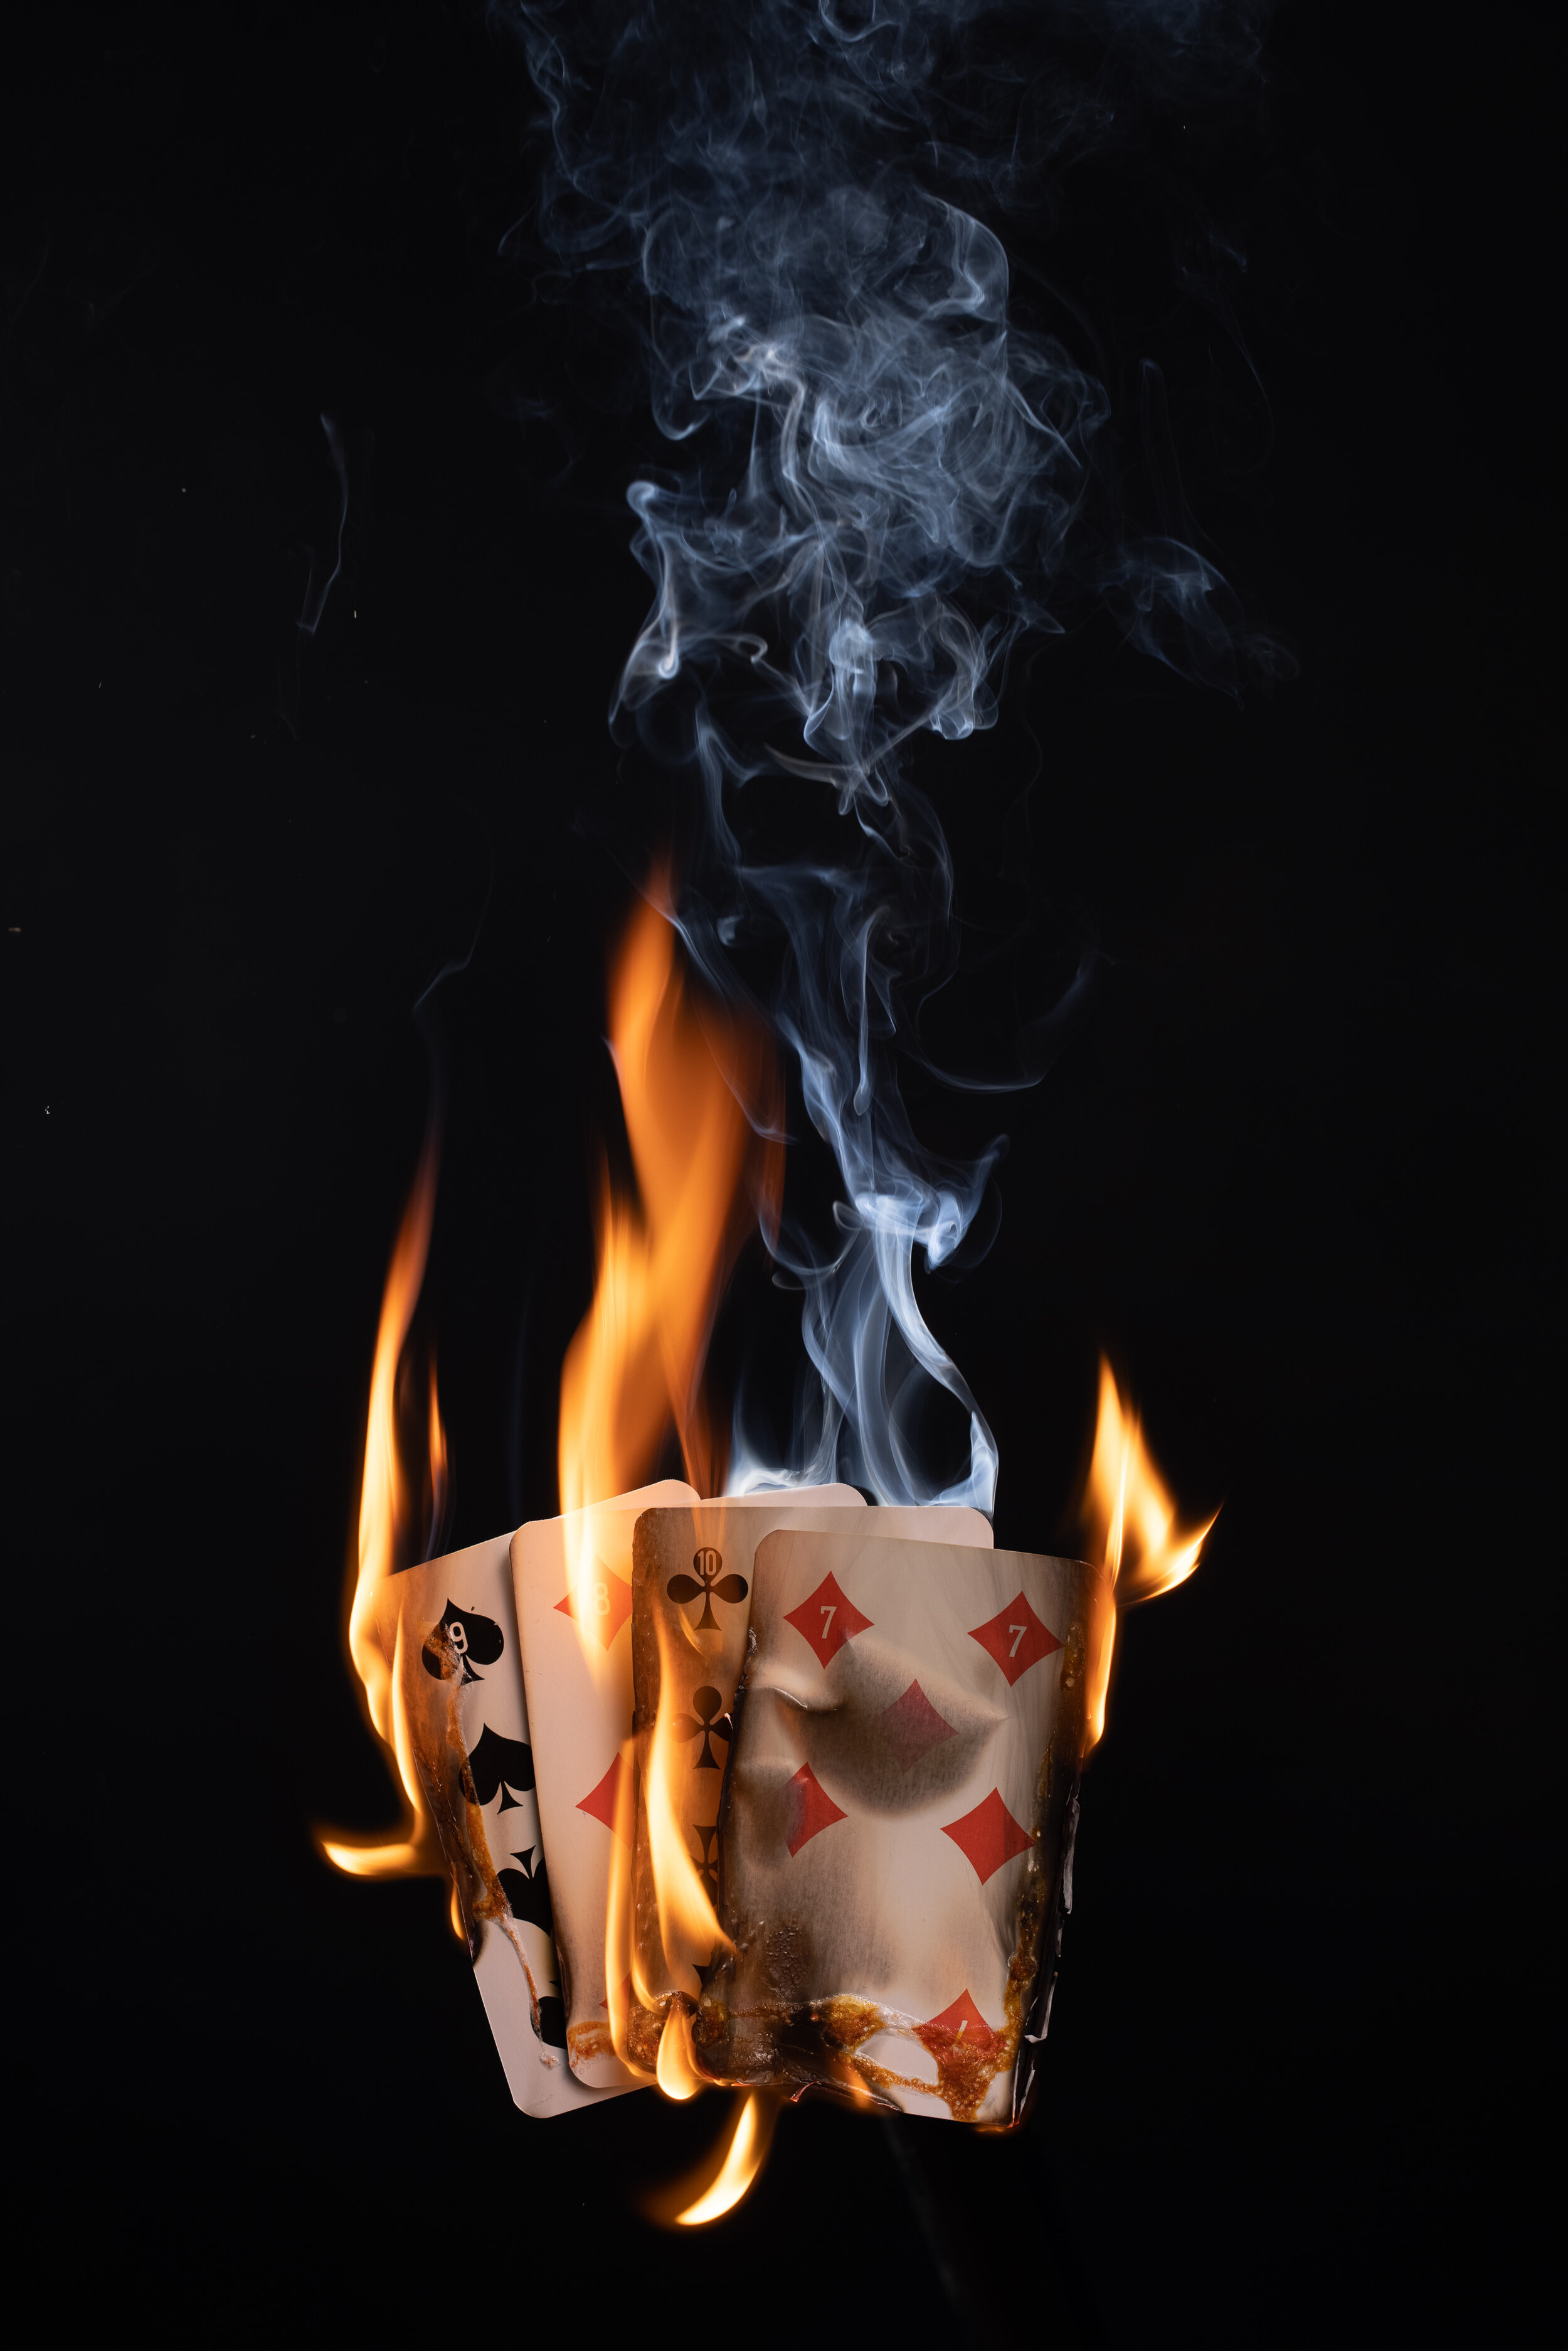
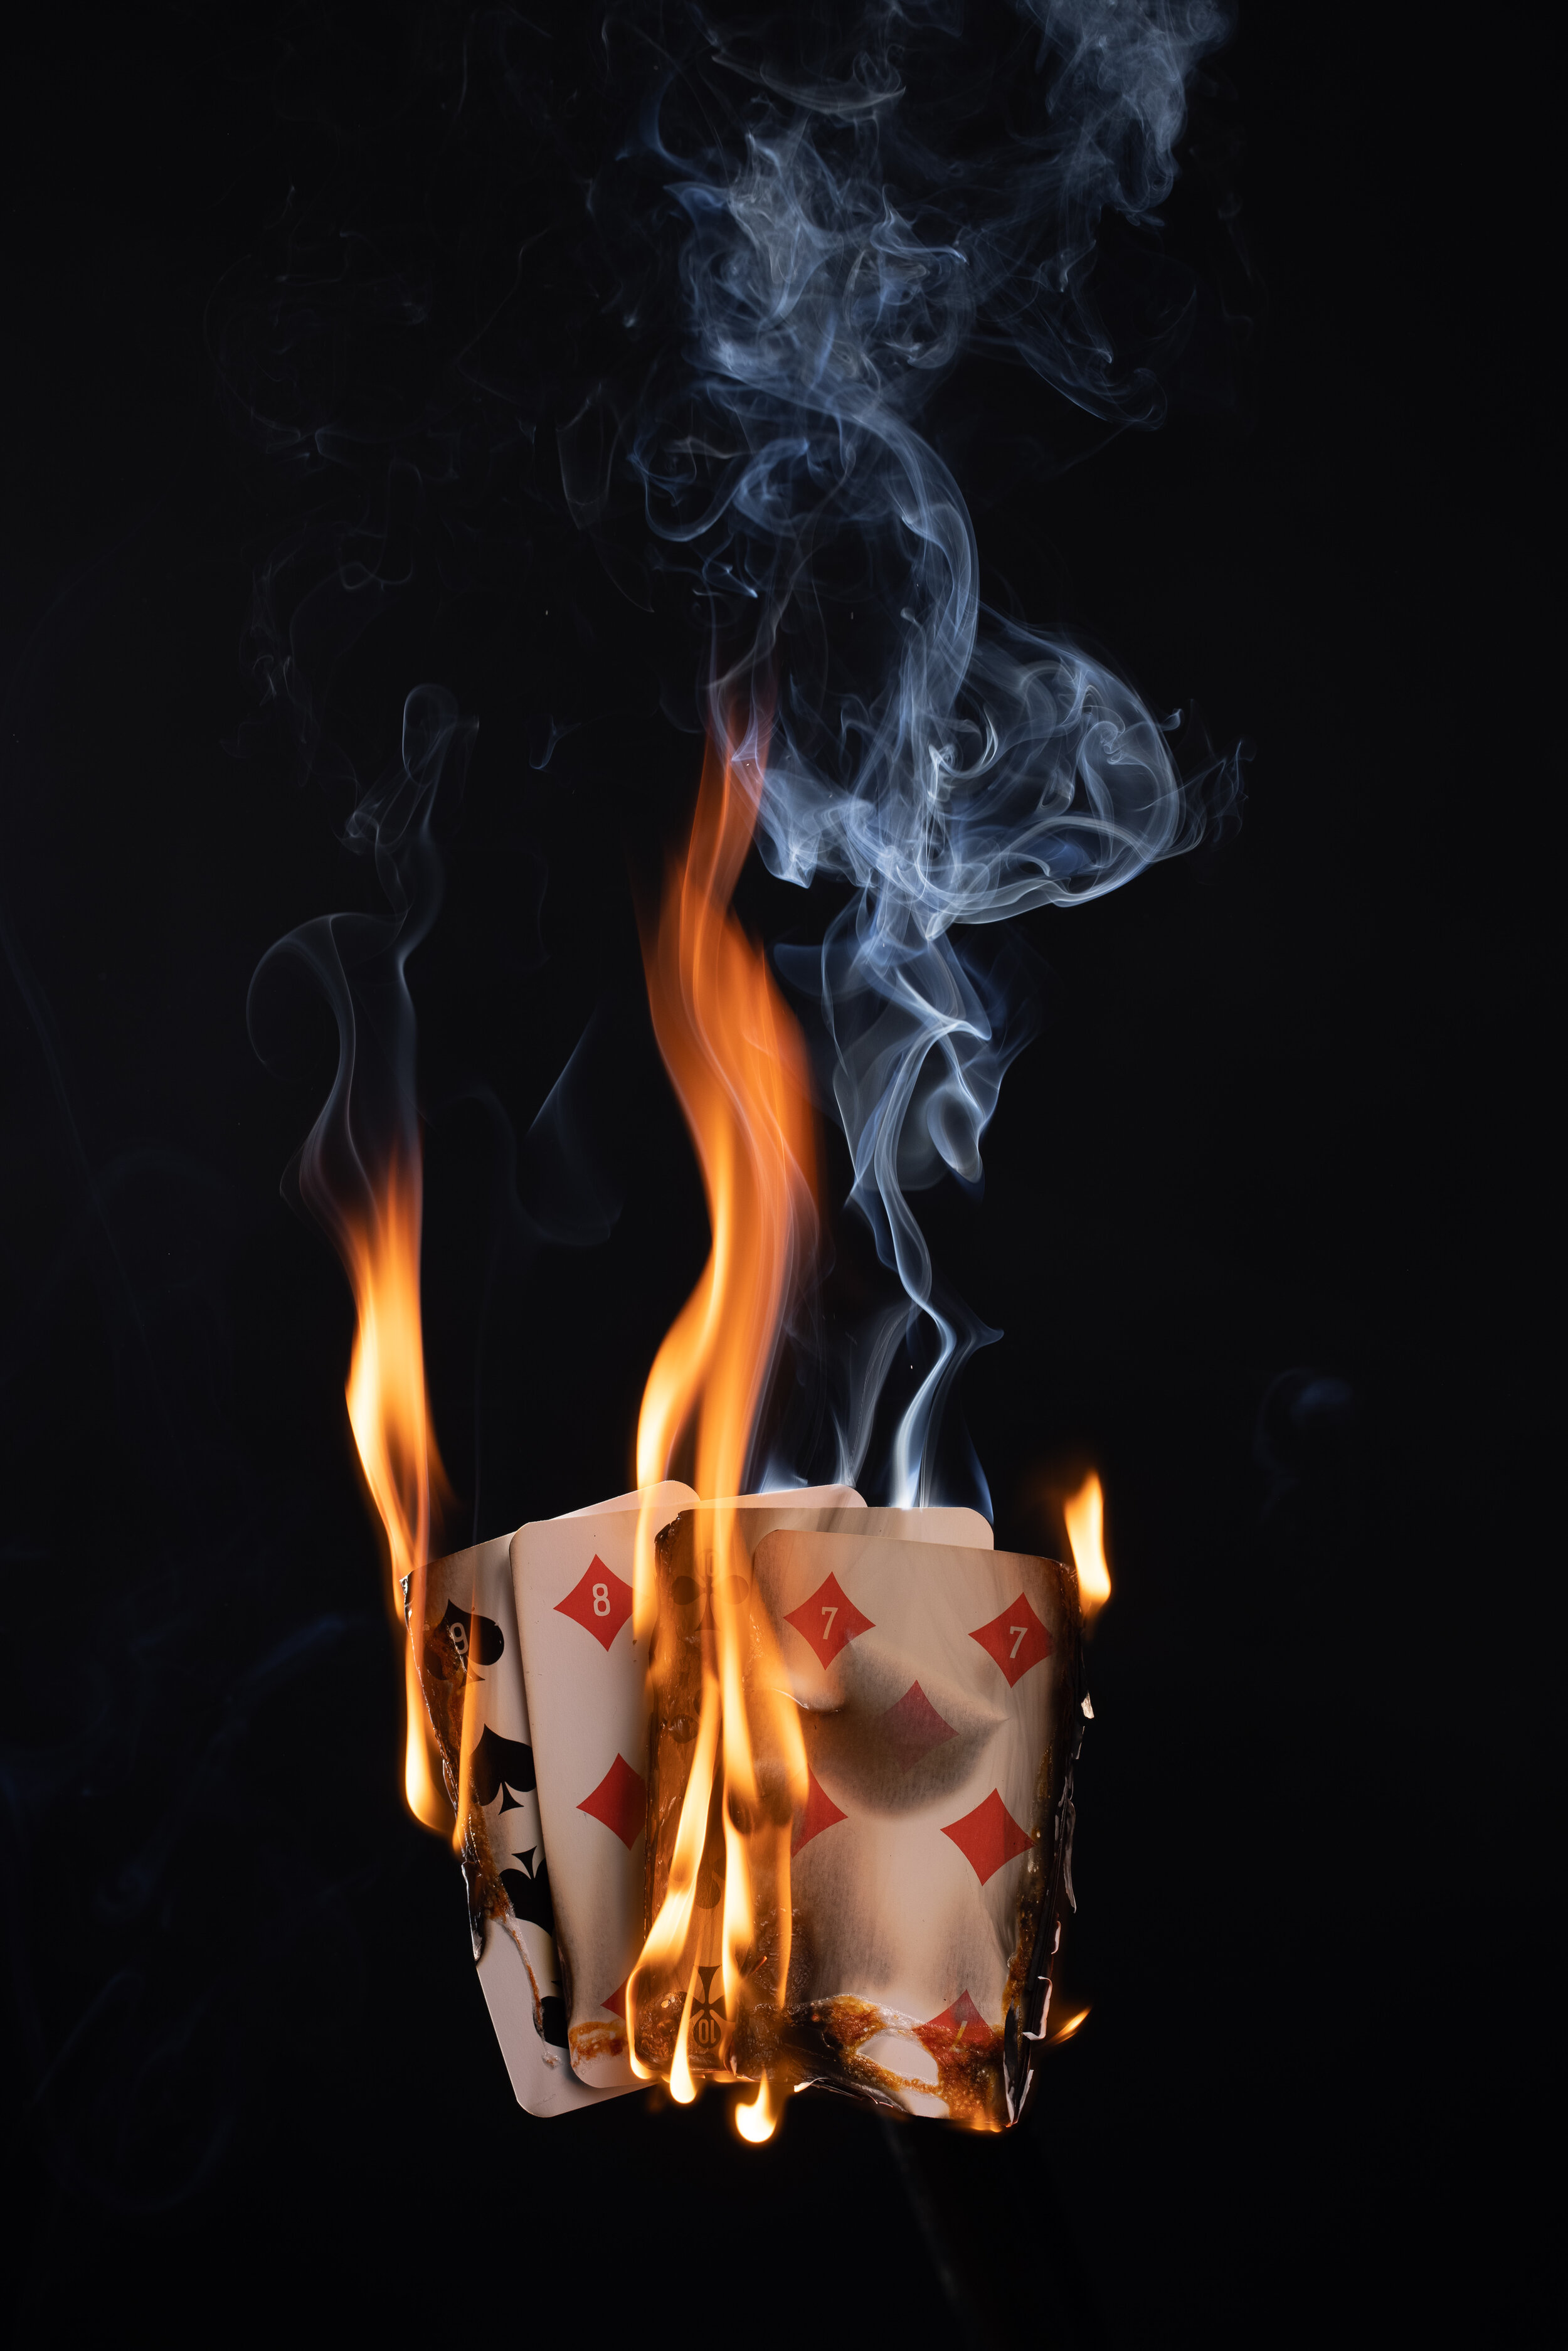
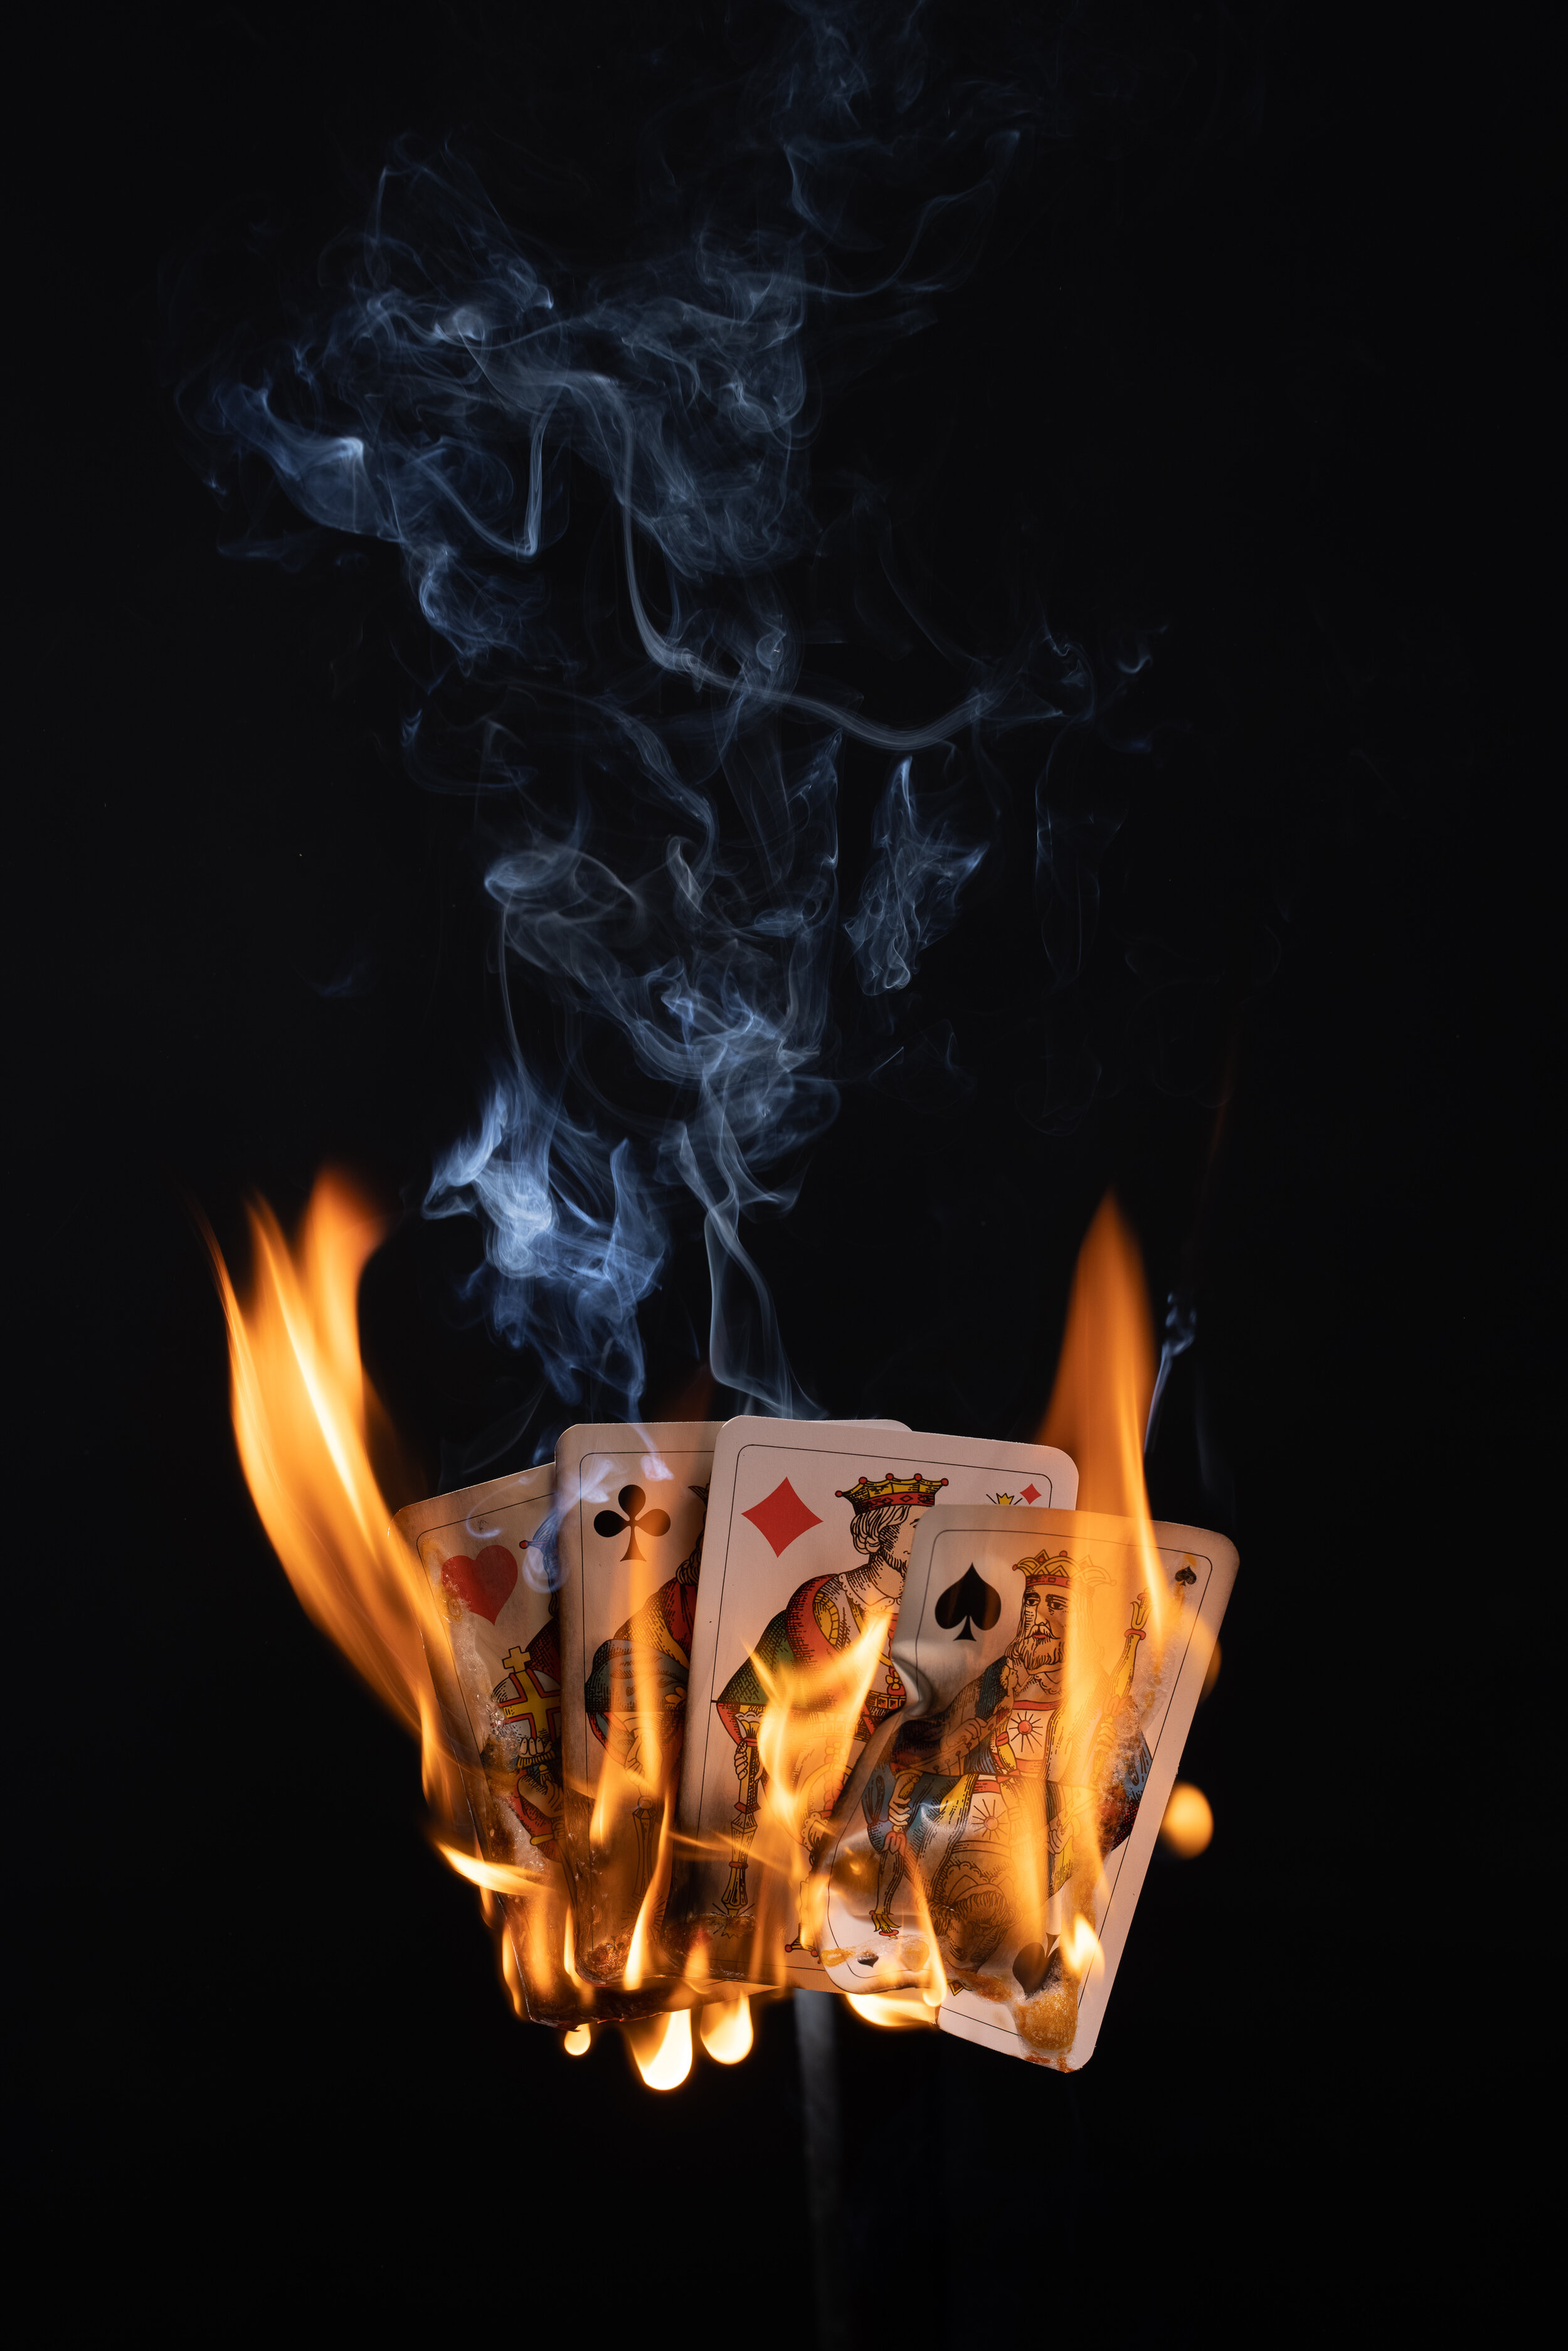
As a second game with the fire we wanted to light French Jass cards and take pictures during the burning down, when the edges are already burned, but the cards are still recognizable. With a small Speedlite from behind it was also possible to catch the smoke in the air.

Light setup play with the Fire 2
Setup Play with the Fire Part II
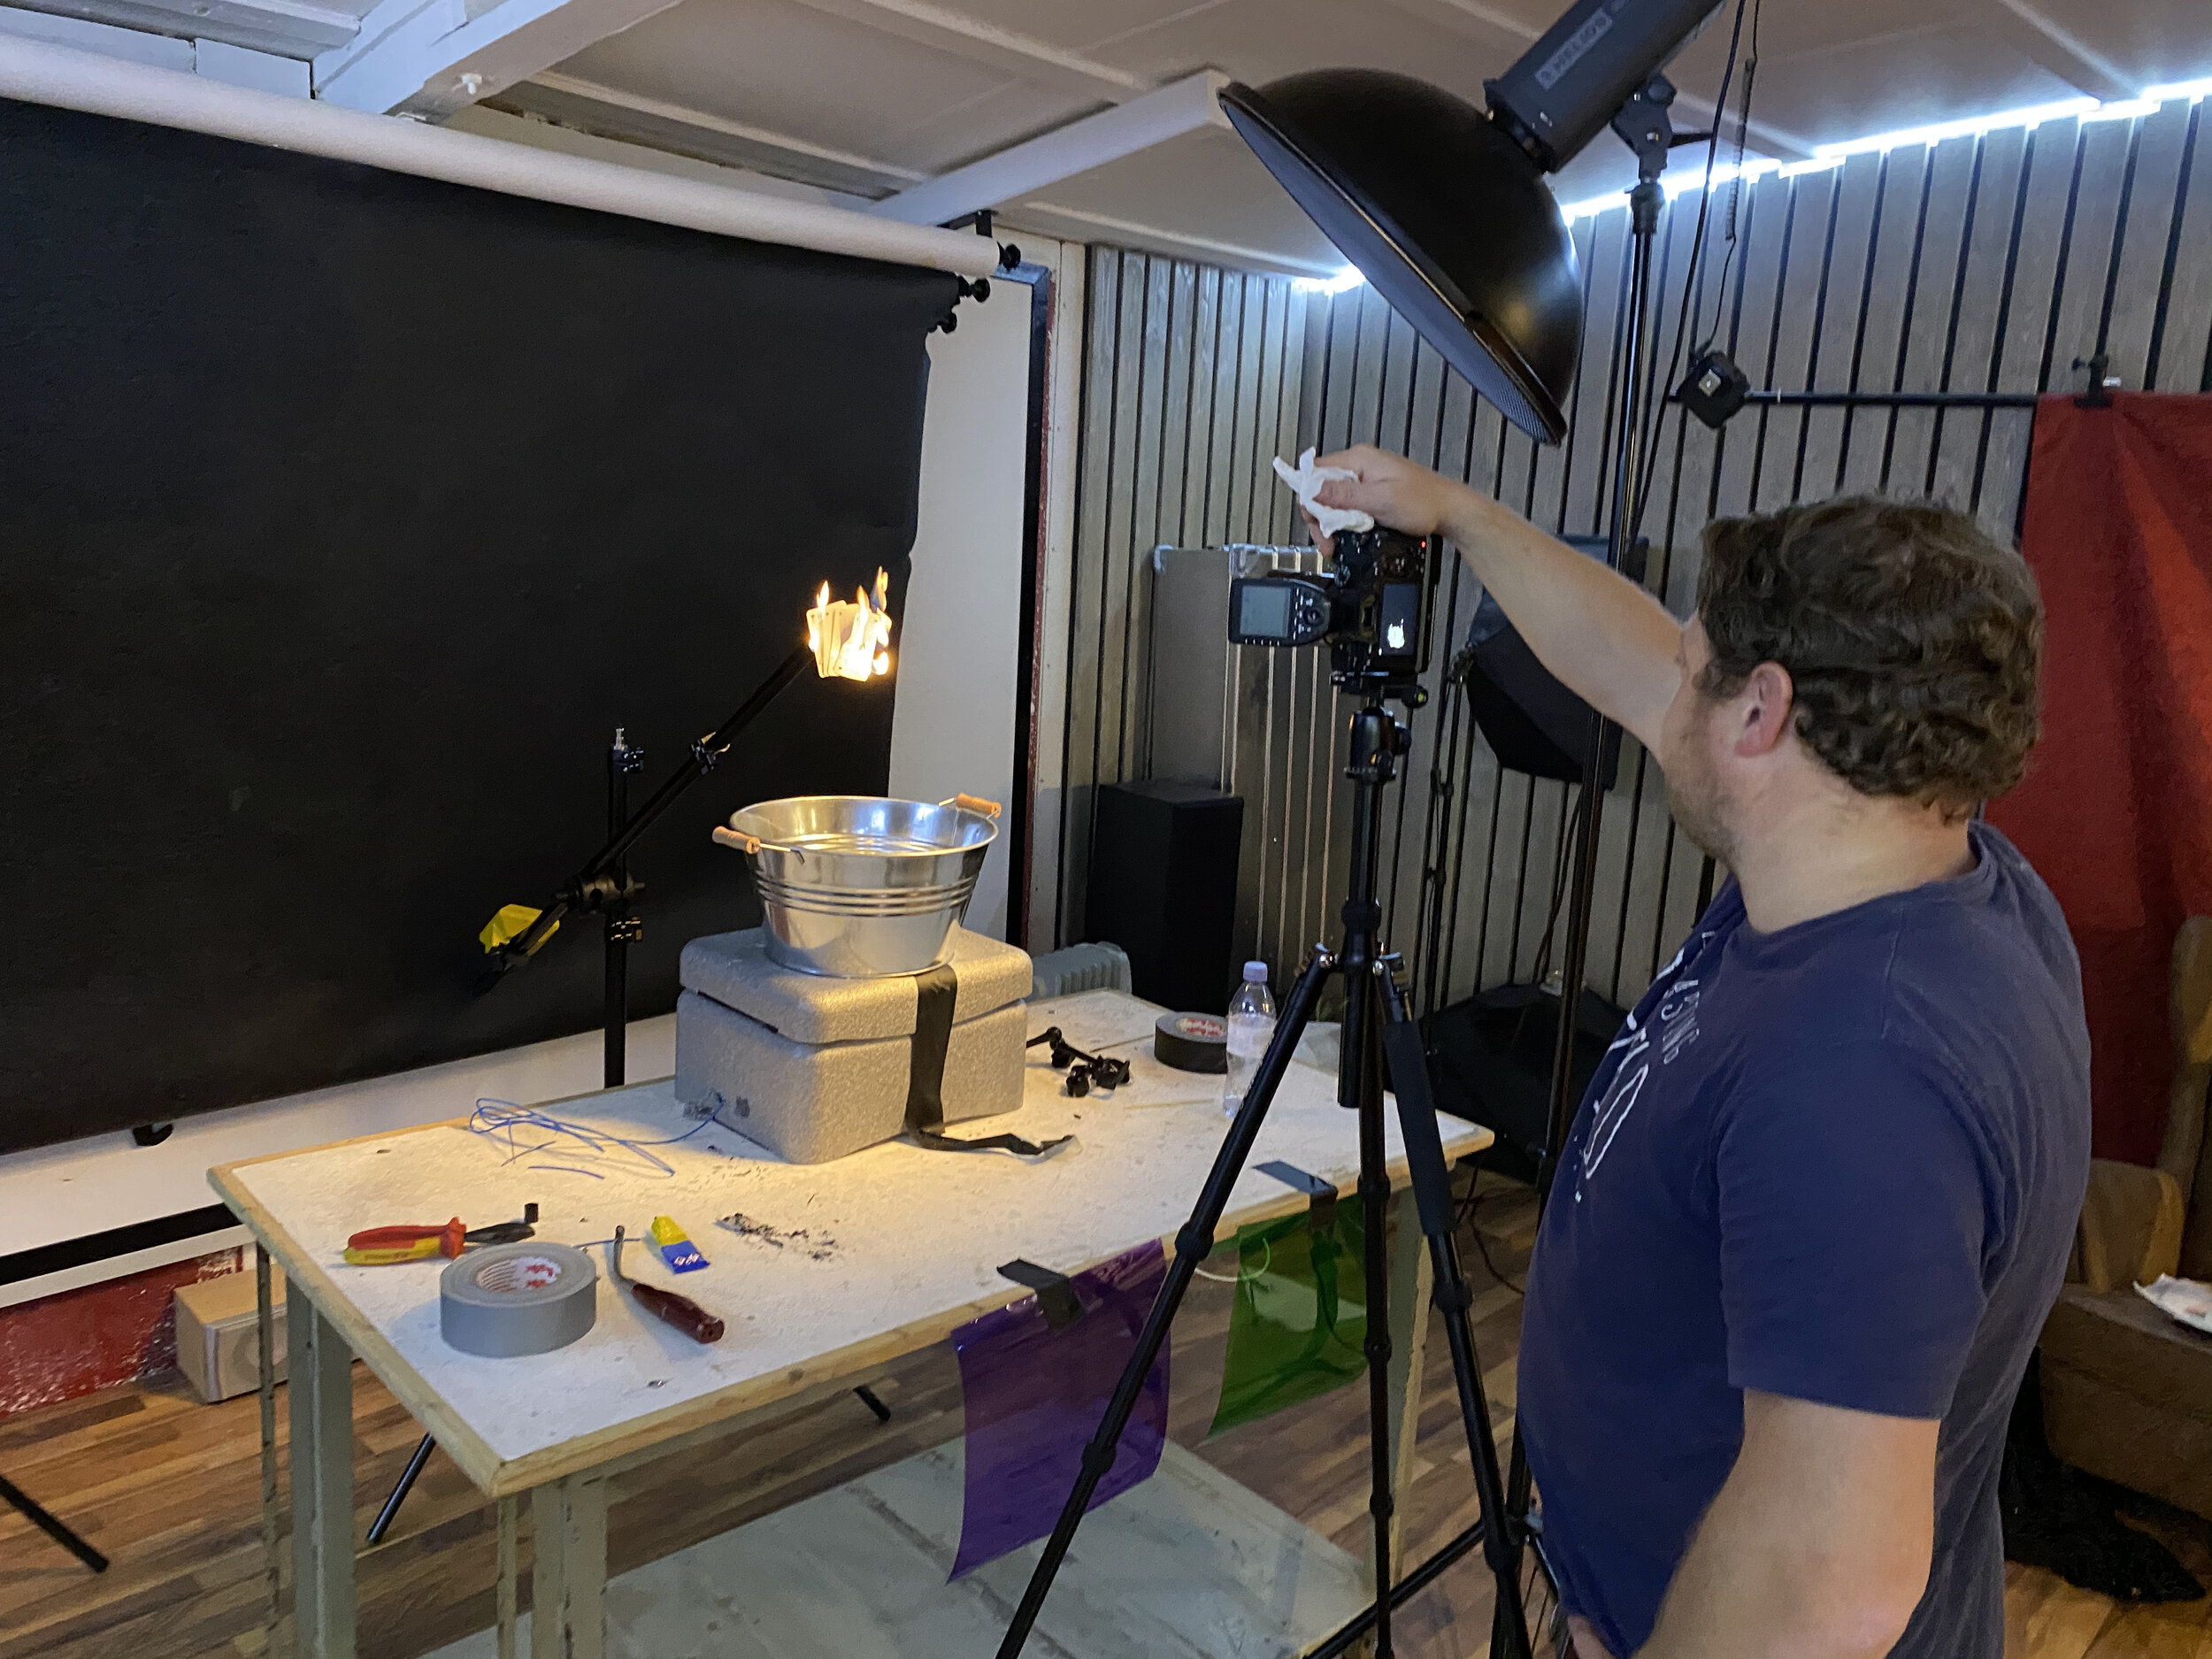
To make sure that we don't burn down the whole photo studio right away, we have placed a metal bucket under the cards to be burned. The burned cards fell directly into this bucket. We had filled the bucket with some water so that the fire could be extinguished quickly. Now the actual placing and lighting of the cards was the biggest challenge.
The first thing we have to do is get the cards in position and make sure they stay there. So we stuck four cards together with tape on the back. Then we bent a piece of wire and taped it to the backside so that we could attach it to the front of the lamp tripod.
The next problem we came across is the flammability of the cards. The cards are coated with PVC so that they can withstand some wine or water. But this coating also causes them to burn very badly or extinguish them immediately. We used an old trick and smeared the front of the cards with highly flammable glue. This meant that the cards burned off much better. Well then, now it has to be done quickly. Before the cards are completely burnt.
Links to our other Blog Posts of this series:
Hope you liked our little Blog Series. If you are interested for more Tips and Tricks or How-To's like this, then don't forget to subscribe to our newsletter. So you won't miss any of our blogs and always be the first to know about new posts